10 Insanely Easy Birthday Cake Ice Cream Hacks
Table of Contents
1. Introduction to Birthday Cake Ice Cream
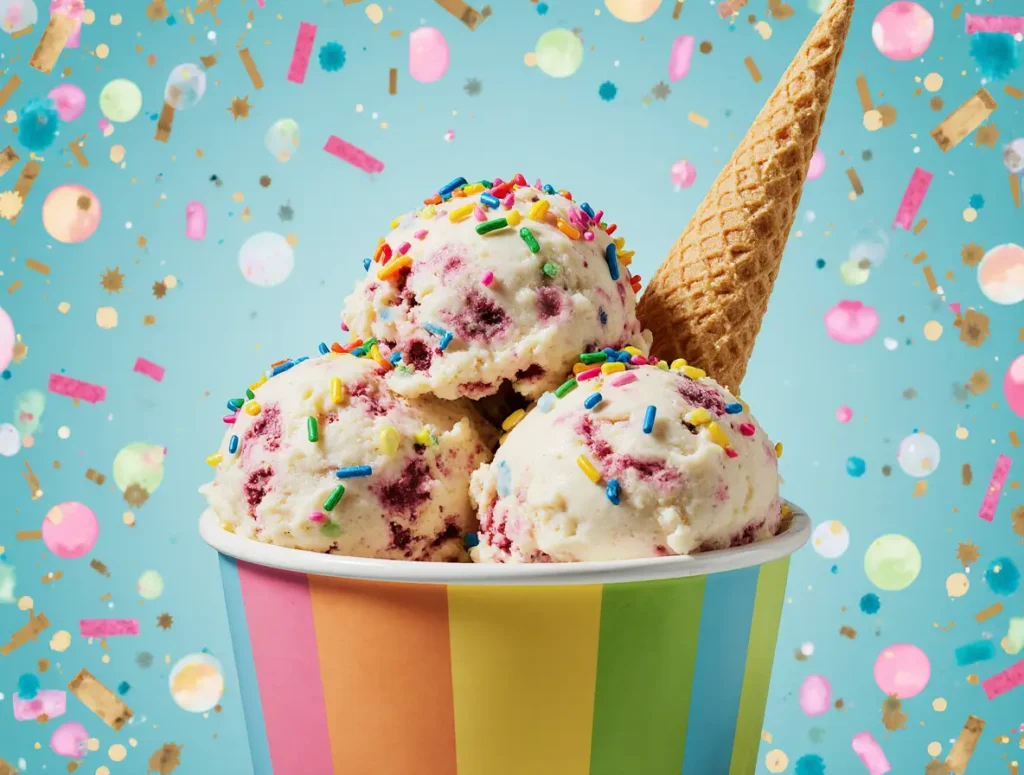
Imagine a bowl of creamy, dreamy ice cream that tastes just like your favorite birthday cake Ice Cream. That’s exactly what this Birthday Cake Ice Cream recipe delivers—without the need for eggs or complicated custards. With a smooth vanilla base, colorful rainbow sprinkles, and swirls of sweet blue frosting, every bite feels like a celebration.
Whether you’re making it for a summer birthday, a kid’s party, or just because you’re craving something fun and festive, this recipe is a game changer. It combines the flavor of classic birthday cake with the cold, creamy texture of homemade ice cream. And the best part? It’s incredibly easy to make.
You don’t need any fancy culinary skills—just an ice cream maker, some simple ingredients, and a love for dessert. The whole process is straightforward and mess-free. In fact, it’s a fun project to do with your kids or friends over a weekend. Once frozen, you’ll have a magical dessert that looks as good as it tastes. Let’s dive into how to make this sweet party-in-a-bowl treat!
2. Ingredients
- 1½ cups whole milk
- 1½ cups heavy cream
- ½ cup granulated sugar
- 2 teaspoons cake batter flavoring
- 1 teaspoon pure vanilla extract
- ¾ cup vanilla frosting
- 1 drop blue food coloring (optional, for swirl effect)
- ⅓ cup rainbow sprinkles
Optional Add-In:
- 1 cup cake pieces (vanilla cupcakes or boxed cake, cut into ½” cubes)
3. Directions
- Freeze your ice cream maker bowl overnight or as per the manufacturer’s instructions.
- In a large mixing bowl, whisk together whole milk, heavy cream, sugar, cake batter flavor, and vanilla extract until sugar fully dissolves.
- If needed, blend the mixture for 30 seconds in a blender to avoid a gritty texture.
- Pour the mixture into your ice cream maker. Churn according to the manufacturer’s instructions (usually 15-25 minutes) until it reaches a soft-serve texture.
- In a small bowl, microwave the vanilla frosting for 5-10 seconds to make it slightly pourable.
- Mix in the blue food coloring (optional) until evenly tinted.
- In a 9″ x 5″ loaf pan, layer ⅓ of the churned ice cream. Drizzle with tinted frosting and swirl gently with a butter knife. Sprinkle a few rainbow sprinkles on top.
- Repeat the layering two more times until all ice cream, frosting, and sprinkles are used.
- Cover tightly with plastic wrap. Freeze for at least 6 hours, or until fully set.
- Scoop and serve!
4. How to Prepare
Begin by prepping your ice cream maker bowl—most need to be frozen for 12–24 hours in advance. This step is crucial, so plan ahead! Next, blend the base. The key is to fully dissolve the sugar in the milk and cream mix to avoid any unpleasant grainy texture.
Once your base is ready, churn it in your ice cream maker. While the machine works its magic, prepare your frosting swirl. Microwave the vanilla frosting until it’s just pourable. Stir in your preferred food coloring for a bright, cake-like look.
Now for the fun part: layering! Alternate between layers of churned ice cream, frosting swirls, and rainbow sprinkles in a loaf pan. You can get creative with the swirl patterns—make it as bold or subtle as you like.
Want to level it up? Fold in bite-sized cake pieces right before layering. Once all layers are in, cover the pan and freeze thoroughly. In a few hours, you’ll have a show-stopping dessert ready to scoop.

5. Preparation Time
- Prep time: 30 minutes
- Churning time: 15-25 minutes
- Freezing time: Minimum 6 hours
- Total time: About 6 hours 30 minutes
Note: This is a “prep-and-wait” recipe. Most of the time is spent waiting for it to freeze, so it’s perfect to make the day before your party or event.
6. Servings
Yields: 8 generous servings
Serving size: About ½ to ¾ cup per person

7. FAQs
Q1: Can I make this Birthday Cake ice cream without an ice cream maker?
Yes! You can mix the base ingredients and freeze in a loaf pan, stirring every 30 minutes for 3–4 hours to reduce ice crystals.
Q2: What is cake batter flavor, and where do I get it?
Cake batter flavor is a sweet, buttery extract that mimics boxed cake mix taste. It’s available online or in most baking supply stores.
Q3: Can I use a different color instead of blue for the frosting swirl?
Absolutely! Any food coloring works—pink, purple, yellow. Choose one that matches your party theme or personal taste.
Q4: How do I store leftovers?
Store in an airtight container in the freezer. For best texture, consume within 1-2 weeks.
Q5: Can I add real cake into the Birthday Cake ice cream?
Yes! Use about 1 cup of cake cubes. Fold them in after churning but before layering for extra texture.
8. Conclusion
There’s something truly magical about combining birthday cake flavors with the cool, creamy texture of ice cream. This Birthday Cake Ice Cream recipe captures that joy in every spoonful. It’s rich, colorful, and full of fun—perfect for birthdays, holidays, or even a mid-week treat just because you deserve it.
Even better, it’s incredibly simple to make. You don’t need eggs, a stove, or hours of prep work. Just whip it together, swirl in the frosting, and let the freezer do the rest. The result? A vibrant dessert that tastes like a party, looks amazing, and brings smiles to everyone’s faces.
Try it once, and it might just become your go-to celebration ice cream. And hey, don’t wait for a birthday to enjoy it. Life’s short—eat the birthday cake ice cream anytime you want!